
I was editing a video at 1 AM last week, fighting with my timeline for the third time because my TikTok clip looked perfect, but my YouTube Shorts version had my subject’s head cut off. My friend sent me a message that basically said I had been doing extra work for no reason, and honestly that stung a little because she was completely right. I had been using CapCut for almost two years at that point and still didn’t know half of what it could do.
That conversation made me actually sit down and go through every menu, every icon, every tiny toolbar option I usually scrolled past. Turns out CapCut is hiding a bunch of AI tools that most casual users never touch. Some of them saved me hours. Some of them produced results so bad on my first try that I had to sit back and figure out what I was actually doing wrong.
Here’s everything I found, tested, and messed up along the way.
AI Script: Your Lazy Brainstorming Partner
AI Script generates a full video script for you based on a topic or a few keywords you type in. It’s meant for people who freeze up when they open a blank notes app and stare at it for ten minutes.
You’ll find it under the Create or Templates section on the home screen, sometimes labeled as “AI Script” or bundled inside “AI Tools.” On Android and iPhone, it sits in roughly the same spot, though Android tends to update the layout more often.
I used it for a “morning routine” video when I had zero ideas and a deadline in two hours. It gave me a rough script with a hook, three main points, and a closing line. It wasn’t perfect. The tone felt a little stiff, but it gave me a skeleton to build from instead of starting cold.
The common mistake people make is using the script word for word without editing it. It reads fine on paper, but sounds robotic when you actually say it out loud. Always read it aloud once before filming. You’ll catch the awkward parts immediately.
AI Captions: The Feature That Changed My Watch Time
AI Captions listens to what you actually said in the video and builds the subtitles from that, timed to match your speech without you touching a single timestamp. This alone might be the most underrated feature in the entire app.
You’ll find this in the Captions tool at the bottom of the toolbar. Tap “Auto Captions” and let it do the work rather than sitting there typing every word yourself. It processes in under a minute for most short clips.
The first time I used it, I expected garbage results. Instead, it caught almost every word correctly, including a weird slang term I use that autocorrect never gets right. My retention on that video jumped noticeably because people watch with sound off way more than we think.
The mistake I made early on was not proofreading the captions before posting. One caption came out as “let’s Edith” instead of “let’s edit,” and within an hour, someone had already commented asking me who Edith was and if she would be in future videos. Always scan through line by line before exporting, even a 30-second clip.
Auto Reframe: The One That Started This Whole Article
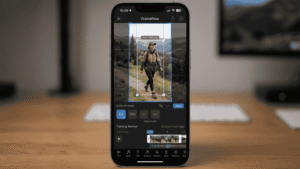
Auto Reframe handles the resizing for you. Pick your target format, whether that’s vertical for TikTok, square for Instagram, or widescreen for YouTube, and it follows your subject through the whole clip so nobody ends up headless at the edge of the frame.
It’s tucked inside the editing tools, usually under “Reframe” or sometimes labeled “Auto Cutout” depending on your app version. Tap your clip, find the ratio icon, and choose Auto instead of manual crop.
This is the feature that fixed my 1 AM disaster. I had shot a video in landscape for YouTube and needed a vertical version for Reels. Auto Reframe tracked my face through the whole clip and kept me centered without me dragging a single crop box.
The common mistake is blindly trusting it in group shots or during fast movement. It can lose track of the subject for a second or two when multiple people are moving around. Always scrub through the reframed version before exporting to catch any weird jump cuts.
AI Background Remover: Fun Until It Isn’t
This tool removes your background without a green screen, using AI to detect your subject and cut it out cleanly. It’s meant for replacing backgrounds with images, videos, or just a plain color.
You’ll find it under effects, then “Background Removal” or sometimes inside the “Cutout” tool, depending on which version you’re running. I spent two weeks only testing it on video clips before I accidentally dropped a photo in and realized it worked on that too. Two weeks of missing an obvious option sitting right there.
I used this to put myself in front of a fake beach for a joke video. It worked shockingly well on my hair and shoulders. Where it struggled was around my hands, especially when I was gesturing or holding my phone. It kept leaving a ghostly outline behind.
The mistake most people make is using it in low light. The AI needs contrast between you and your background to work properly, and dim lighting confuses it fast. Film near a window or with a ring light if you’re planning to remove the background later.
AI Color Match: Making Clips From Different Days Look Like One Shoot
AI Color Match analyzes the color grading of one clip and applies a similar tone to another clip, so footage shot on different days or in different lighting looks consistent.
It’s found in the Adjust or Color panel, usually near the manual color grading sliders. You select a reference clip, then apply the match to the rest of your footage.
I filmed a vlog over three days with wildly different lighting each time, morning light one day, gray and cloudy the next. Color Match pulled them together way better than I expected. The whole video finally looked like it belonged together.
The mistake here is picking a bad reference clip. If your reference footage is overexposed or has a weird tint, that gets copied onto everything else too. Pick your best-looking clip as the reference, not just the first one in your timeline.
AI Voice Changer: My Funniest CapCut Moment
This tool changes the pitch and tone of your recorded voice into different presets, like deep, robotic, chipmunk, or various character voices. It’s under the Audio tab, then “Voice Effects” or “Voice Changer.”
Here’s my funny story. I was testing this for a prank video and accidentally left the “deep robotic” filter on when I sent a rough cut to my mom for feedback. She called me immediately, dead serious, asking if I was feeling okay because my voice sounded “possessed.” I still bring this up to her at family dinners.
Outside of pranks, I started using a subtle pitch shift on some of my narration clips where my voice was coming out flat and tired sounding. It made a real difference without making me sound like a cartoon.
The mistake most people make is overusing extreme filters on serious content. A slight pitch adjustment can sound natural, but the chipmunk or demon voice presets should stay for jokes only, not your actual narration.
Beat Sync: The Feature That Saved Me From Manual Tapping
Beat Sync detects the beats in your background music and automatically places cut markers on those beats, so your clips change exactly when the music hits.
You’ll find it in the Audio tab after adding your music track. Then tap the beat icon that looks like a small waveform with dots. It scans the whole song in a few seconds.
I used to manually tap along to music to mark my cut points, and I was always slightly off, no matter how many times I tried. Beat Sync nailed it in one pass, and my edit suddenly felt way more professional without any extra effort.
The common mistake is applying it to every single clip without adjusting pacing. Not every scene needs a cut on every beat. Sometimes letting a shot breathe for two beats looks better. Use it as a starting point, then delete a few markers manually if the pacing feels too chaotic.
AI Enhance: Fixing Footage You Thought Was Ruined
AI Enhance improves video quality by sharpening details, reducing noise, and boosting clarity, making it especially useful for footage shot in low light or on an older phone camera.
It’s located under the Adjust tool, listed as “Enhance” with a small AI tag next to it. One tap applies it, and you can control the intensity with a slider.
I had an old clip shot on a phone from years ago that looked grainy and dull. After running Enhance, the difference was real enough that I actually reused that clip in a new video instead of reshooting it.
The mistake people make is cranking the intensity all the way up. It can start to look artificial or oversharpened, almost like a bad Instagram filter from 2014. Keep it around 40 to 60 percent for most clips and compare before and after before committing.
Mistakes I Made So You Can Skip Them
Test every AI feature on a throwaway clip first, not your actual project. Export settings can reset after using certain AI tools, so double-check your resolution before posting. And don’t stack too many AI effects on one clip, because they can fight each other and slow down your render time significantly.
None of these tools is magic, and they won’t fix a boring video idea. But they will save you time on the technical stuff so you can spend more energy on the part that actually matters, the content itself. Next time you open CapCut, spend ten minutes just tapping around menus you normally skip. You might find your own version of that 1 AM realization I had.