Learn how to use CapCut in 2026 with simple steps, practical tips, and pro editing tricks to create stunning videos even if you’re starting.
Introduction to CapCut
If you’re looking for a powerful yet simple video editing app, CapCut is one of the best options available in 2026. CapCut is free to use and comes with powerful tools that make video editing easy for anyone.
CapCut has become incredibly popular because it allows beginners to create high-quality videos without needing advanced skills. From social media creators to YouTubers, millions rely on it daily.
So, who can use CapCut?
- Beginners with no editing experience
- Content creators for TikTok, Instagram Reels, or YouTube Shorts
- Small business owners creating marketing videos
- Anyone hoping to make their videos look high-quality
How to Download and Install CapCut
Getting started with CapCut is quick and simple.
Download on Android and iOS
Follow these steps:
- Open the Play Store if you have an Android device, or the App Store if you’re on iOS.
- Search for “CapCut”
- Tap Install or Get
- Wait for the app to download
When installation is complete, open the app to get started.
Sign up and start your first project
When you open CapCut:
- You can sign in using Google, Apple, or social media accounts
- You can also skip the login and start editing immediately
To begin editing:
- Tap New Project
- Select videos or photos from your gallery
- Tap Add
Now you’re ready to start your first edit!
How to Start Editing a Video in CapCut
Starting your first project might feel powerful, but the interface is beginner-friendly.
Importing Videos and Photos
When you tap New Project, you can select multiple clips. These will appear in the timeline in the order you choose.
Tip: Select clips in sequence to save time later.
Understanding the Timeline and Interface
The timeline is where all the editing happens. Here’s what you’ll see:
- Video track: Your main footage
- Audio track: Music and sound effects
- Toolbar: Editing tools like trim, text, and effects
- Preview screen: Shows your video in real-time
Basic Navigation
- Slide your finger left or right to navigate the timeline.
- Press to zoom in or out
- Tap a clip to reveal editing options
Once you understand this layout, everything becomes much easier.
Basic Video Editing Features in CapCut
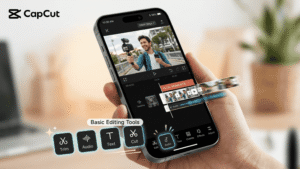
Now let’s explore the core features of CapCut video editing.
Trim and Cut Videos
Trimming helps remove unwanted parts.
Steps:
- Tap the clip
- Drag the edges to shorten it
- Use Split to cut the clip into sections
Example: If you recorded a long clip with mistakes, trim out the errors to keep only the best parts.
Add Music and Sound Effects
Good audio can completely change your video.
To add music:
- Tap Audio
- Choose from sounds, effects, or your own files
- Adjust volume and timing
Tip: Use background music that fits your video, like calm, energetic, or dramatic.
Add Text and Subtitles
Text helps viewers better understand your content.
Steps:
- Tap Text
- Select Add Text
- Type your message
- Customize font, color, and animation
Subtitles are especially important for social media since many people watch videos without sound.
Add Filters and Effects
Filters instantly enhance the look of your video.
- Use filters to adjust color tone
- Add effects for transitions, glow, or motion
Tip: Don’t overuse effects. Keep it clean and professional.
Advanced Editing Tips to Edit Videos Like a Pro

Once you’re comfortable with the basics, try these advanced CapCut tips and tricks.
Using Transitions Between Clips
Transitions make your video flow smoothly.
To add transitions:
- Tap the small box between clips
- Choose a transition style
- Adjust duration
Popular transitions include fade, slide, and zoom.
Using Keyframe Animations
Keyframes allow you to create motion effects.
Example:
- Zoom into a subject gradually
- Move text across the screen
Steps:
- Select a clip
- Tap Keyframe
- Adjust the position at different points
This gives your video a dynamic feel.
Adjusting Video Speed (Slow Motion, Fast Motion)
Speed control can make your content more engaging.
- Use slow motion for dramatic scenes
- Use fast motion for time-lapse effects
Steps:
- Tap the clip
- Select Speed
- Choose normal or curved speed
Using Green Screen (Chroma Key)
This feature removes backgrounds.
Steps:
- Add a green screen clip
- Tap Chroma Key
- Select the green color
- Adjust intensity
Example: Place yourself in a different location without actually being there.
Best Export Settings for High-Quality Video
Export settings affect your final video quality.
Here’s what to choose:
- Resolution:
- 1080p for most videos
- 4K for high-end content
- Frame Rate:
- 30fps for normal videos
- 60fps for smoother motion
- Quality Tips:
- Higher resolution = larger file size
- Balance quality and storage space
Before saving your video, preview it to confirm everything looks good.
Tips to Make Your Videos Look Professional
Even simple edits can look amazing with the right approach.
Follow These Tips:
- Use good lighting
Natural light works best for beginners - Keep clips short and engaging
Avoid long, boring scenes - Add subtitles and captions
Great for accessibility and engagement - Ensure clear audio
Avoid background noise - Follow trends
Watch popular videos and learn what works
Example: Short, fast-paced videos with captions often perform better on social media.
Common Mistakes to Avoid in CapCut
Many beginners make simple mistakes that reduce video quality.
Avoid these:
- Overusing effects and transitions
- Using low-quality footage
- Ignoring audio quality
- Adding too much text
- Not trimming unnecessary parts
Remember: Simplicity often looks more professional.
Conclusion
CapCut is one of the easiest and most powerful tools available today. Whether you’re a beginner or a hopeful content creator, learning how to use CapCut can significantly improve your video quality.
From basic trimming to advanced features like keyframes and green screen, CapCut offers everything you need in one place.
The best part? No need for expensive tools or advanced skills to begin.
Now that you’ve gone through this CapCut tutorial for beginners, it’s time to take action. Open the app, start a project, and experiment with different features.
Practice more, and you’ll see your videos improve.
Happy editing!